HOME |
[This tutorial is for SS1/SSF at the
base but I think you can use it Bought to you by (USSF-LRDG) RoCk |
Ok, I have tried to make this as simple as I can by adding screenshots to show what needs to be done.
HOME |
[This tutorial is for SS1/SSF at the
base but I think you can use it Bought to you by (USSF-LRDG) RoCk |
Ok, I have tried to make this as simple as I can by adding screenshots to show what needs to be done.
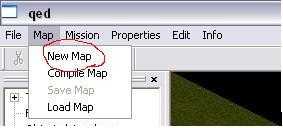
Firstly, open the Sudden Strike Editor, click on "Map" and select "New Map" from the drop down menu as shown in this screenshot below.
Now you need to select the size of your new map. 128 x 128 is the smallest map size, 256 x 256 is the largest. You can, however, make your map any size between these 2 ranges e.g. 160 x 230 providing it is not smaller then 128 or bigger then 256.

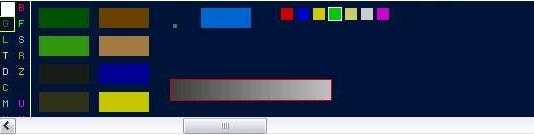
When you have selected the size for your new map, you then need to select your required scheme. There are 4 schemes to choose from; Winter, Desert, Summer and Beach. The difference between Summer and Beach is that when placing water on to the map in Desert, a sand edge to the water will be shown.
With the size and scheme selected, the map must then be set up by using the menu on the side of the editor. You can place buildings, roads, trees and many other details onto it.

Once the map has been designed to your requirements with roads, houses and other details shown, it must then be scripted for a multi player game.
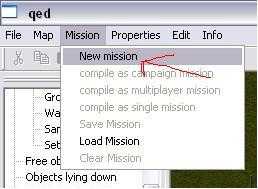
From the top bar of editor, click on "Mission", then select "New Mission" from the drop down menu.
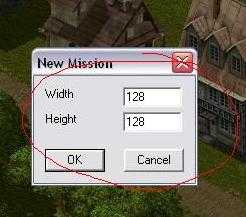
A "mission size" box will be displayed. This must be set to the same size as was chosen for your map, i.e. if your map is 128 x 128 then your mission size must also be 128 x 128.
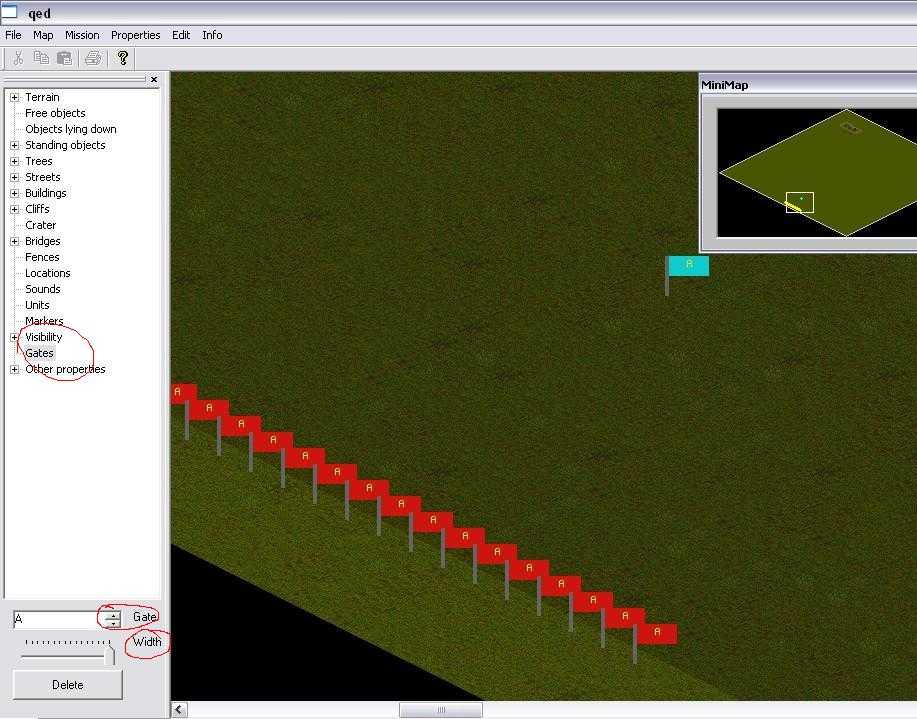
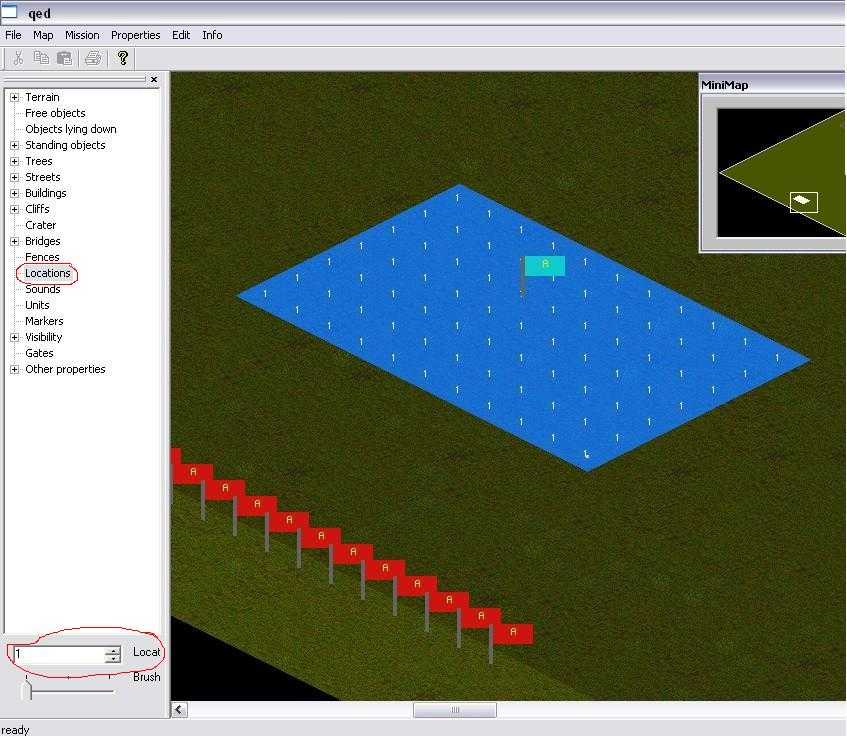
Once the size has been set, the mission and script must be set up. Firstly, gates must be placed on the map as this is where the player's units will enter the screen. From the left hand menu of the Editor, click on "Gates". The gates are represented, in the bottom left corner of the Editor screen, as a small box containing the letter "A" together with a small up and down arrow. There is also a slider bar shown just underneath which varies the width of the gates.
The gates are in alphabetical order, so with Gate A selected you need to go to the position on the edge of the map where you require the units to enter the map. As shown in the screenshot below, you must left click at the position where the the lighter grass meets the darker grass. This will place a red flag with the letter "A" on it in that position. Use the slider bar in the bottom left corner to increase the width of the gates. The wider the gates are set, the more red flags will appear. Approximately six inches away from the red flags, in the dark area, right click on the map. This will then place a light blue flag with the letter "A" on it. This flag represents the position the unit will head for and stop at.
With the gate placed, you need to paste a location around the light blue flag large enough for the units to stop in. Select "Locations" from the left hand menu list. In the bottom left hand corner of Editor, the Gate letter "A" will change to the figure 1. Left click around the area where you placed the light blue flag and a light blue square containing the figure 1 will be shown. A square will be shown for every left click
Now you know how to place gates on to the map, you need to place a gate for every player on the map. For example, if you have made a 4 v 4 map, you will need to place 8 gates on the map each with a different letter and in a different location. So, if you place Gate A with location 1, Gate B is selected in the same way but you will need to select the Gates from the left hand menu, then use the little up and down arrows in the bottom left hand corner of Editor to change the "A" to a "B". Place this on the map the same way as Gate A but the location number must be changed to number 2. Repeat this until you have placed all the gates you need for the players on your map.
If you are creating a 4 v 4 map, one side of it will have Gates A, B, C and D with locations 1, 2, 3 and 4; the other side of the map will have Gates E, F, G and H with locations 5, 6, 7 and 8.
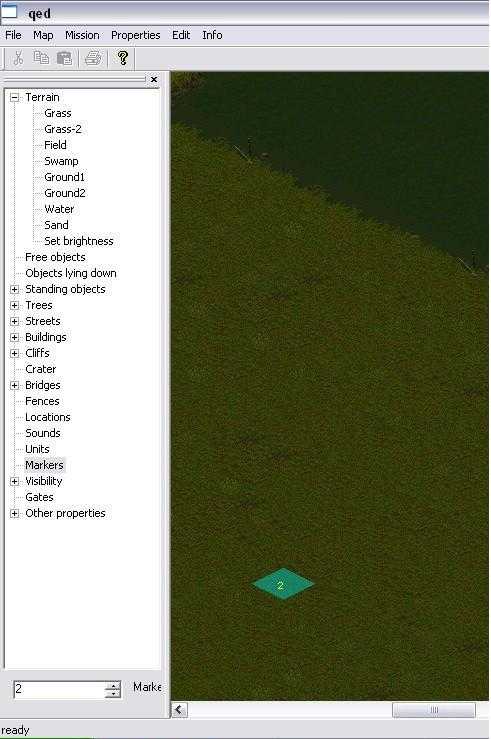
With the gates positioned, the Zeppelins must now be placed onto the map. Click on "Markers" in the left hand menu. These are the Zeppelins. As with the Gates and Locations, the bottom left hand corner of Editor will show a 0 in the small box. This is your first Zeppelin number. Place this on to the map just above the Gate A position. Using the little up and down arrows in the bottom left corner, change the 0 to a 1. This will be the second Zeppelin - place this one close to Gate B

These two Zeppelins will be single Zeppelins in the script.
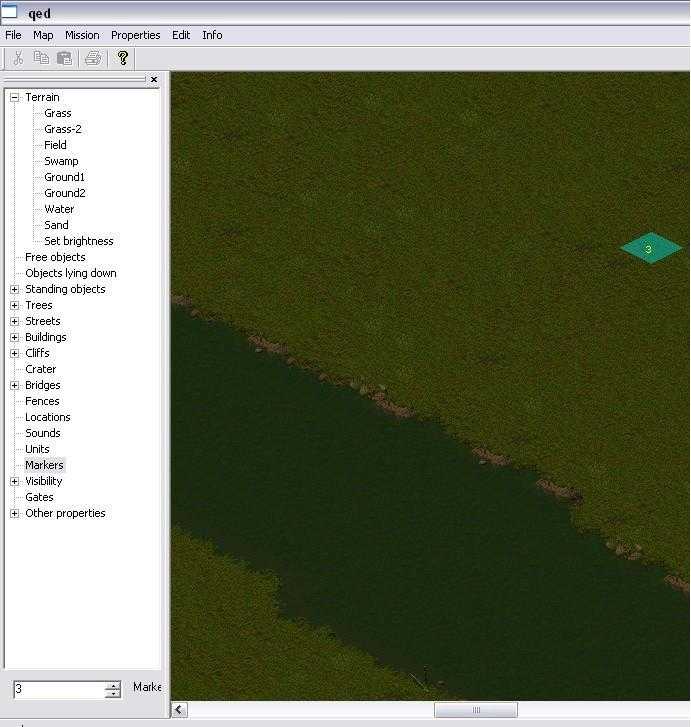
I have placed a stripe of water on the map and will place markers 2 and 3 on either side. In the script, link them together so that they are a pair and will be the same colour.
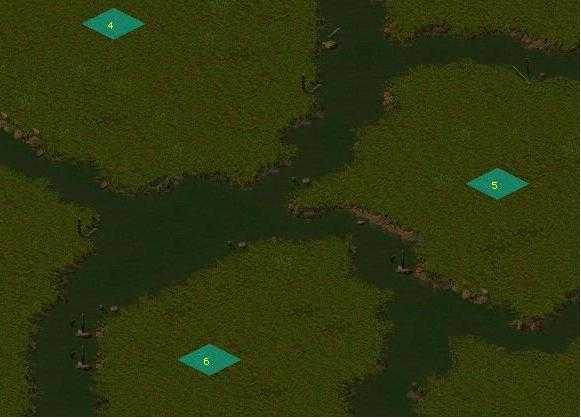
You can also link Zeppelins into a group of 3 or more. In order to finish this section, I will place 3 more markers on map markers 4, 5 and 6 and then link them in the script to become a group of 3
You can place many more markers on the map but the amount of groups and colours available is limited to 12. We have placed 2 singles, a pair and a group of 3. This is only 3 groups, so we could place 9 more groups on the map if required.
Now on to the scripting of our map
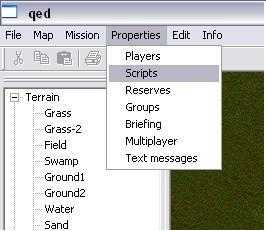
On the top bar of Editor, select "Properties" then select "Scripts" from the drop down menu.
The "Script" box will be displayed. Click on the word "New" which will be highlighted.
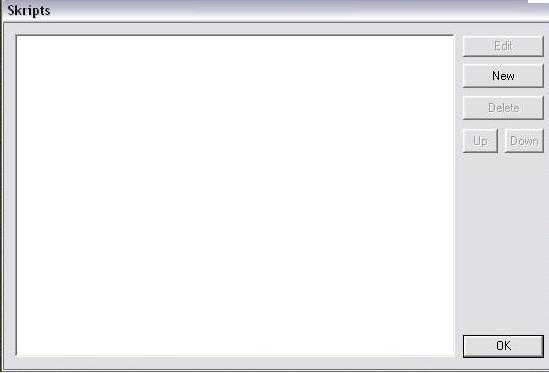
The following screen will be displayed.
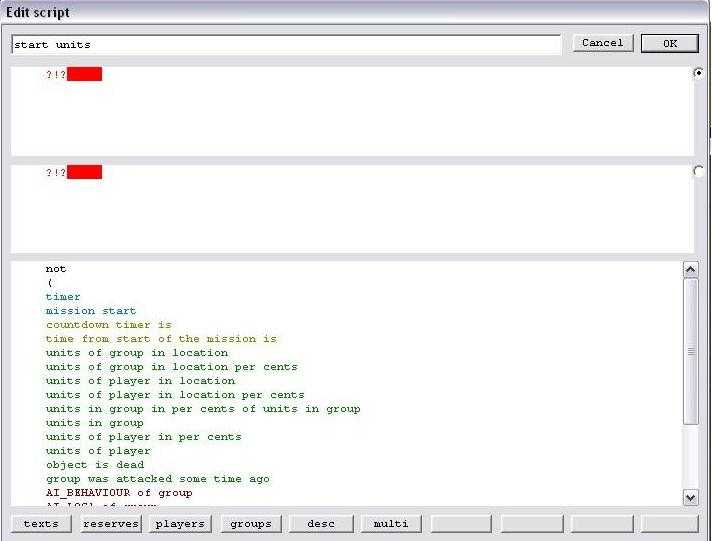
At the top of the box, the words "New Trigger" will be shown. Delete this and type the words "Start Units". This will enable you to find the script easily should you need to change anything in it.
In the text at the bottom of this window, click on "Mission Start" (shown in light blue letters). This will place it into the top window.
In the middle window you will see ?!? click on this and text in bottom window will changed you need to click on the green writing that say DEFINE initial forces this will be placed into the middle window along with Russians<<*>>Germans<<*>>Allies<<*>>delay<<*>>
These refer to you starting force to add units to the different countries you need to fill in these blank, but to do this you first need to set up some reserves. This is done by clicking on reserves in the very bottom bar of this screen this should bring up the units screen
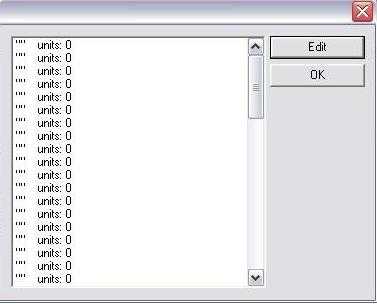
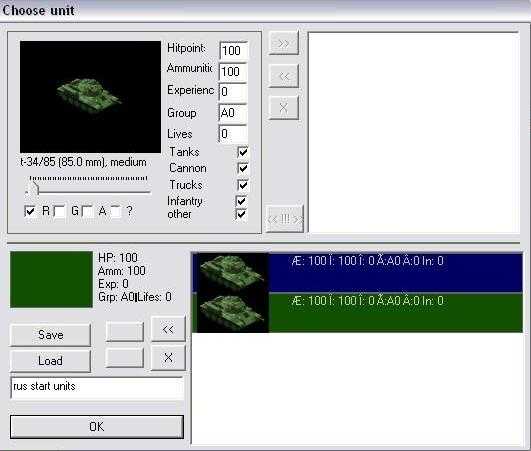
click once on one of the "" units:0 and then click on the edit button
as you can see from above screenshot just above the ok button bottom left i have name this rus start units you will see why later
to add units you need to first just have the box with R beside it ticked this mean that all the units will just be Russian unit making it easier for you as in this set of reserve you just want Russian units above these boxes is a slider use the slider to change the picture top left to what unit you want to add (i have chosen Russian T-34 tank ) to add them just click on the big green box this will place one tank on to the right hand side every time you click it i just placed 2 tanks but you can place anything that you want to make up you starting units
to add trucks is a little different as you will no doubt want to have troops in them, to do this use slider to select picture of truck then to the right of the picture there is a bottom which looks like this <<!!!>> you have to click on this to add men into the truck when you have clicked on <<!!!>> the picture of the truck changes to a picture of a man using the slider again you can change the picture to the type of man you want to place in the truck to add him to the truck just click on the button >> repeat this till you have the men you want in truck you then need to click <<!!!>> again to get back to picture of truck then click the big green square and it will add the truck with men in it to the list
one word of warning when adding men to trucks check to make sure that there hit points is on 100 and also there ammunition is on 100

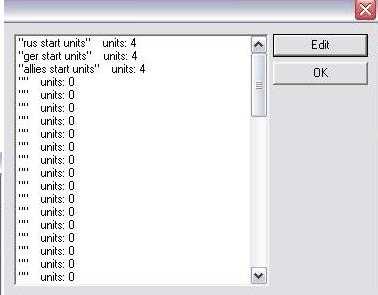
now if you click ok it takes you back to the "" units: screen you should have rus start units and a number of units you add to them in the top line
select the next line down and click edit now this time you need to tick the G and un tick the R so you can just select the German units repeat what you done for the Russians naming this on German start units ok and repeat for allies once done your units screen should look like this
now click ok and return to the define initial force script now you can click on the first <<*>> next to Russian and this will appear
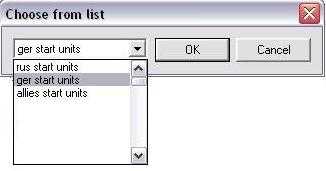
select rus start units from it, you have now added the reserve you set up into the Russian section this will be what arrives on the map for the Russians at start of game repeat this for Germans and allies in the last <<*>> delay this is the time delay that the units will have as it is the start you want them to appear straight away so leave time as it is 00:00:00
with this done go to top right hand corner and click on ok
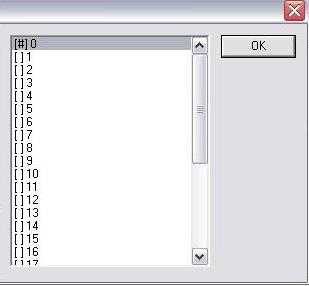
this will take you back to the first script box you need to click on new again this one will be for the 2 single markers you placed on map, so delete new trigger at the top and rename it single zeppelins as before in the text at bottom click on Mission start in the light blue writing this appears in the top window in the second window as before click on ?!? and from the new text in bottom window click on the green writing that says DEFINE reinforcement for zeppelin(S) this will be placed into the middle window and looks the same as before with one difference The first <<*>> is for the marker number so click on this and from the list of numbers double click on the top one which is 0 it should then have a # next to it click ok
and as with the first script for the start units you need to assign reverse to this zeppelin go to reserves at bottom of screen and pick the units you want each country to get after capture of the zeppelin and add them by clicking on the <<*>> beside each country. The delay time can be set at say 5 minutes meaning that once you capture zeppelin in game you have to wait 5 minutes before they will arrive on the map now before you click ok at the top you need to click on DEFINE reinforcement for zeppelin(s) again and do the same for marker 1
Once you have done click on ok top right corner and you are back to the first script screen click new again then delete new trigger and type in units for pair of zeppelins same as before select mission start from text so it appear in the top window then click on ?!? in the middle window select DEFINE reinforcement for zeppelin(s) from bottom text
to link markers 2 and 3 together so they are a pair all you have to do is in the first <<*>> click on it and double click on numbers 2 and 3 so they both have a # next to them this will link them together making them the same colour click ok and add units the same as you did in the start units and single zeppelin scripts once done click ok top right corner and return to the first script box click on new again this time delete new trigger and type in group of 3 , this will be script for the markers 3,4,5 making them a group of 3 as before click on mission start in light blue letters and then on the ?!? in the middle window then select DEFINE reinforcement for zeppelin(s) from bottom text in the first <<*>> click on it and double click on numbers 3,4,5 this will link them into a group of 3 and make them all the same colour add units to the different countries as before and the time delay. now that is your script almost finished before you click ok at the bottom bar
![]()
if you click on desc this will take you to blank screen, this is were you can type you map briefing in this is the texts that scrolls on the side of screen in lobby when you are waiting to launch game. The button to the right of this is for setting how many players can play map so if you have made say a 4v4 you need to set it 2to8 players in top 2 boxes it will close bottom 4 slots in lobby so only 8 can join room any more would crash the game if you started it
the bottom 2 refer to the amount of teams 2to4 is so you can have up to4 teams on map
The next button is the players button this will let you add spy planes and bombers to the different nation any plane you add here is what they will start the game with you will also have to add planes to every nation
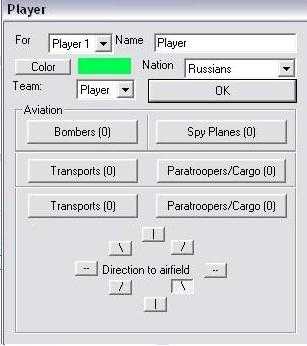
in the top left box it says player 1 leave it on that nation it says Russian so you will be adding planes for the Russians to have just click on spy planes the first line is for what type of plane you need to select a Russian plane the second line is for how many you want to give them the third wing size is the amount of planes they can send on to the screen at one time so if you give them 10 planes but only a wing size of 5 they can only have 5 planes on the screen at one time and any planes that get shot down will reduce the wing size so if you send first 5 planes out and 3 get shot down you will only have 2 planes left even though you still have 5 flights hope that isn't to complicated once you have given the Russian the amount of plane you want them to have click on the player 1 box at top and change to player 2 this will be for the Germans do same again so they have even amount to the Russian the click again to change it to player 3 this will be for allies again make sure they are even with the others.
Now if you want to add bomber to a zeppelin say to our group of 3 as you should still be on the script for it, in the bottom text you will see DEFINE air support for zeppelin(S) and flights of planes for flags click on both of these so they are placed into the middle window as in screenshot below

in the <<*>> this time th first one is for which marker you want to attach them to so click on it and double click on 4,5,6 so they have # beside them and click ok this has not tied them to the group of 3 then next <<*>> is for the amount you wish to get say 5 and the last <<*>> is for the type of plane we will pick bomber you have to do this for both lines when you have done you can click ok top right corner then ok the script box and you should be back on the map.
Now all you have to do is save your map and mission and compile it into multi player map
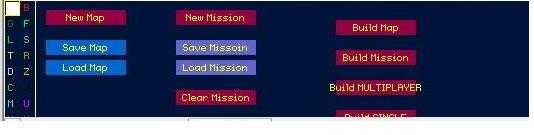
this is done by going to top of editor and select edit and from pull down menu click on original interface this will make a blue box like in screenshot below appear at bottom of screen click on the little white square in the top left corner of this box change it to the save and load menu
first click on save map and save your map then save mission then you have to select build multi player to save map into you game so you can play it also what you name it in here when you click on build multi player is what the map will be called in you map list
Building pontoons up cliffs
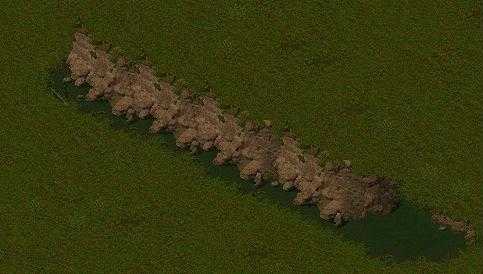
to build pontoons up cliffs you need to first add a stripe of water 2 blocks wide

then you need to select other properties from left hand menu open it so you have 3 chooses select no waves from here a paste a line of blue no wave boxes down centre of water
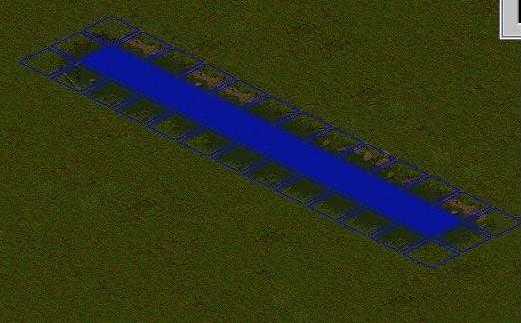
with this done all you need to do is add cliffs on top of this and you will be able to build pontoon bridge up the cliff you place on it
Holding building and receiving reinforcements for them
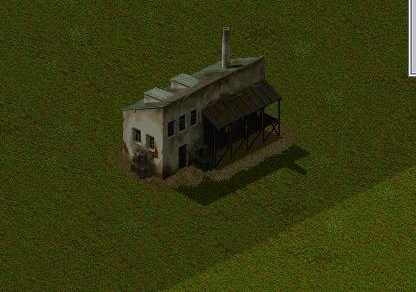
first you need to place a build or area that you want to set as one you need to hold on to the map
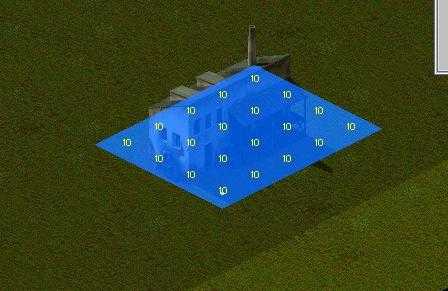
now paste a location around it
this location is where the units need to be to hold the building to receive the reinforcements for it. now you need to add a gate and location for the
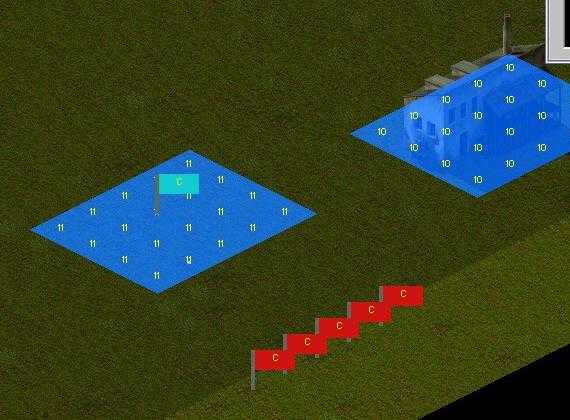
reinforcements to come through
it should look like this once finished remember not to select a location you have already used for some thing else or a gate
now you have to add the script for this to work so go to properties at top bar of editor and select script then click on new instead of normal were you click on mission start from the text you need to click on units of player in location
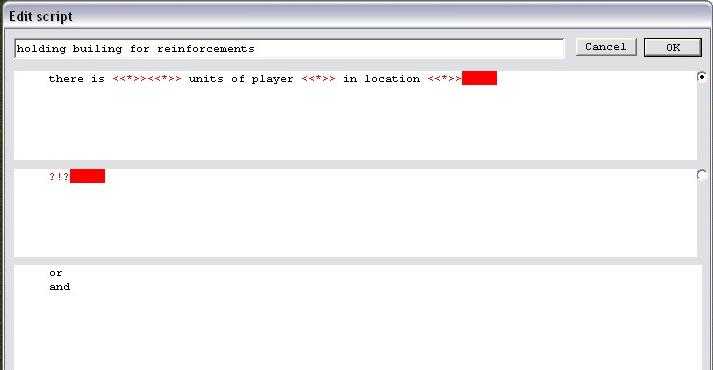
now click on the ?!? in the middle window and select send reinforcements
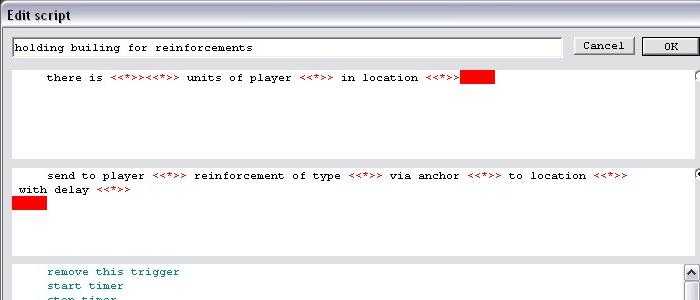
you should now go to reserves at bottom bar and set up a unit group
then all you do is fill in the blanks when finished you should have it looking like this screenshot
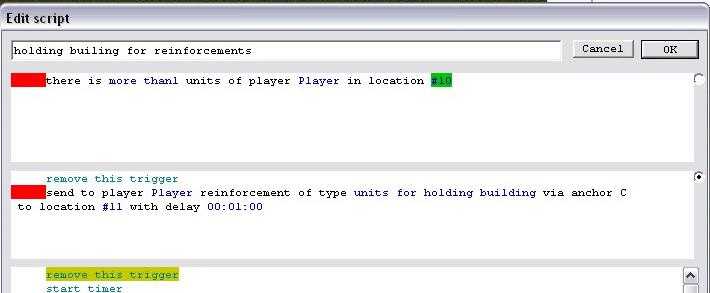
i have add remove trigger this is because if you don't it will keep sending units with out end . there is a way to send reinforcement every so many minutes but sorry i have not worked it out yet :-)
i will be adding to this tutorial as i know more stuff